Advanced Installation
Environment variables
| Name | Description |
|---|---|
CYPRESS_INSTALL_BINARY | Destination of Cypress binary that's downloaded and installed |
CYPRESS_DOWNLOAD_MIRROR | Downloads the Cypress binary though a mirror server |
CYPRESS_CACHE_FOLDER | Changes the Cypress binary cache location |
CYPRESS_RUN_BINARY | Location of Cypress binary at run-time |
CYPRESS_VERIFY_TIMEOUT | Overrides the timeout duration for the verify command. The default value is 30000. |
CYPRESS_DOWNLOAD_PATH_TEMPLATE | Allows to specify custom download url. Replaces ${endpoint}, ${version}, ${platform}, ${arch} with respective values |
removed use CYPRESS_INSTALL_BINARY=0 instead | |
removed use CYPRESS_INSTALL_BINARY instead |
Install binary
Using the CYPRESS_INSTALL_BINARY environment variable, you can control how
Cypress is installed. To override what is installed, you set
CYPRESS_INSTALL_BINARY alongside the npm install command.
This is helpful if you want to:
- Install a version different than the default npm package.
shell CYPRESS_INSTALL_BINARY=2.0.1 npm install cypress@2.0.3 - Specify an external URL (to bypass a corporate firewall).
shell CYPRESS_INSTALL_BINARY=https://company.domain.com/cypress.zip npm install cypress - Specify a file to install locally instead of using the internet.
shell CYPRESS_INSTALL_BINARY=/local/path/to/cypress.zip npm install cypress
In all cases, the fact that the binary was installed from a custom location is
not saved in your package.json file. Every repeated installation needs to use
the same environment variable to install the same binary.
Skipping installation
You can also force Cypress to skip the installation of the binary application by
setting CYPRESS_INSTALL_BINARY=0. This could be useful if you want to prevent
Cypress from downloading the Cypress binary at the time of npm install.
CYPRESS_INSTALL_BINARY=0 npm install
Now Cypress will skip its install phase once the npm module is installed.
Binary cache
As of version 3.0, Cypress downloads the matching Cypress binary to the global
system cache, so that the binary can be shared between projects. By default,
global cache folders are:
- MacOS:
~/Library/Caches/Cypress - Linux:
~/.cache/Cypress - Windows:
/AppData/Local/Cypress/Cache
To override the default cache folder, set the environment variable
CYPRESS_CACHE_FOLDER.
CYPRESS_CACHE_FOLDER=~/Desktop/cypress_cache npm install
CYPRESS_CACHE_FOLDER=~/Desktop/cypress_cache npm run test
Cypress will automatically replace the ~ with the user's home directory. So
you can pass CYPRESS_CACHE_FOLDER as a string from CI configuration files, for
example:
environment:
  CYPRESS_CACHE_FOLDER: '~/.cache/Cypress'
See also Continuous Integration - Caching section in the documentation.
CYPRESS_CACHE_FOLDER will need to exist every time cypress is launched. To
ensure this, consider exporting this environment variable. For example, in a
.bash_profile (MacOS, Linux), or using RegEdit (Windows).
Run binary
Setting the environment variable CYPRESS_RUN_BINARY overrides where the npm
module finds the Cypress binary.
CYPRESS_RUN_BINARY should be a path to an already unzipped binary executable.
The Cypress commands open, run, and verify will then launch the provided
binary.
Mac
CYPRESS_RUN_BINARY=~/Downloads/Cypress.app/Contents/MacOS/Cypress cypress run
Linux
CYPRESS_RUN_BINARY=~/Downloads/Cypress/Cypress cypress run
Windows
CYPRESS_RUN_BINARY=~/Downloads/Cypress/Cypress.exe cypress run
We recommend not exporting the CYPRESS_RUN_BINARY environment variable,
since it will affect every cypress module installed on your file system.
Download URLs
If you want to download a specific Cypress version for a given platform (Operating System), you can get it from our CDN.
The download server URL is https://download.cypress.io.
We currently have the following downloads available:
- Windows 64-bit (
?platform=win32&arch=x64) - Linux 64-bit (
?platform=linux) - macOS 64-bit (
?platform=darwin)
Here are the available download URLs:
See https://download.cypress.io/desktop.json for all available platforms.
| Method | URL | Description |
|---|---|---|
GET | /desktop | Download Cypress at latest version (platform auto-detected) |
GET | /desktop.json | Returns JSON containing latest available CDN destinations |
GET | /desktop?platform=p&arch=a | Download Cypress for a specific platform and/or architecture |
GET | /desktop/:version | Download Cypress with a specified version |
GET | /desktop/:version?platform=p&arch=a | Download Cypress with a specified version and platform and/or architecture |
Example of downloading Cypress 3.0.0 for Windows 64-bit:
https://download.cypress.io/desktop/3.0.0?platform=win32&arch=x64
When setting
CYPRESS_DOWNLOAD_PATH_TEMPLATE='${endpoint}/${platform}-${arch}/cypress.zip'
environment variable, then a custom download url is used, where
${endpoint},
${platform}, ${arch} are replaced with respective values.
https://download.cypress.io/desktop/3.0.0/win32-x64/cypress.zip
Mirroring
If you choose to mirror the entire Cypress download site, you can specify
CYPRESS_DOWNLOAD_MIRROR to set the download server URL from
https://download.cypress.io to your own mirror.
For example:
CYPRESS_DOWNLOAD_MIRROR="https://www.example.com" cypress install
Cypress will then attempt to download a binary with this format:
https://www.example.com/desktop/:version?platform=p
Using a custom CA
Cypress can be configured to use the ca and cafile options from your NPM
config file to download the Cypress binary.
For example, to use the CA at /home/person/certs/ca.crt when downloading
Cypress, add the following to your .npmrc:
CYPRESS_DOWNLOAD_USE_CA=1
ca=/home/person/certs/ca.crt
Opt out of sending exception data to Cypress
When an exception is thrown regarding Cypress, we send along the exception data
to https://api.cypress.io. We solely use this information to help develop a
better product.
If you would like to opt out of sending any exception data to Cypress, you can
do so by setting CYPRESS_CRASH_REPORTS=0 in your system environment variables.
Opt out on Linux or macOS
To opt out of sending exception data on Linux or macOS, run the following command in a terminal before installing Cypress:
export CYPRESS_CRASH_REPORTS=0
To make these changes permanent, you can add this command to your shell's
~/.profile (~/.zsh_profile, ~/.bash_profile, etc.) to run them on every
login.
Opt out on Windows
To opt out of sending exception data on Windows, run the following command in the Command Prompt before installing Cypress:
set CYPRESS_CRASH_REPORTS=0
To accomplish the same thing in PowerShell:
$env:CYPRESS_CRASH_REPORTS = "0"
To save the CYPRESS_CRASH_REPORTS variable for use in all new shells, use
setx:
setx CYPRESS_CRASH_REPORTS 0
Install pre-release version
If you would like to install a pre-release version of Cypress to test out functionality that has not yet been released, here is how:
- Open up the list of commits to
developon the Cypress repo: https://github.com/cypress-io/cypress/commits/develop - Find the commit that you would like to install the pre-release version of.
Click the comment icon (highlighted in red below):

- You should see several comments from the
cypress-botuser with instructions for installing Cypress pre-releases. Pick the one that corresponds to your operating system and CPU architecture, and follow the instructions there to install the pre-release.
Cypress pre-releases are only available for 60 days after they are built. Do not rely on these being available past 60 days.
Windows Subsystem for Linux
First, install the prerequisite packages using the command that relates to your linux distribution (Ubuntu/Debian or CentOS).
We need to have an X-server to display the Cypress UI from the linux subsystem. There are a variety of X-servers available, here we are going to use VcXsrv, you can use any other similar tool.
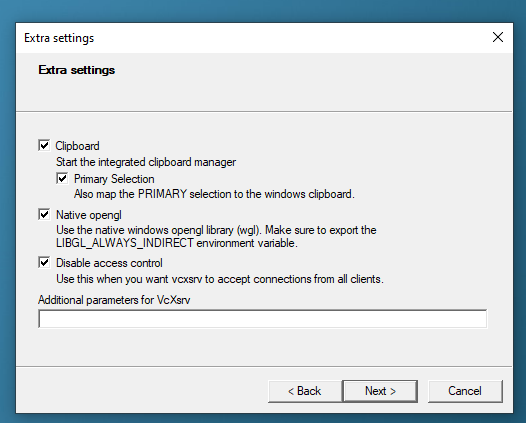
Download VcXsrv and install. You can set the settings to your preference ("Multiple windows" and "Start no client" are recommended), but on the page that lets you enable extra settings, be sure to select "Disable access control" which is required as WSL2 has its own IP address, which changes often.
In your .bashrc (or equivalent such as .zshrc) set the DISPLAY environment
variable.
# set DISPLAY variable to the IP automatically assigned to WSL2
export DISPLAY=$(cat /etc/resolv.conf | grep nameserver | awk '{print $2; exit;}'):0.0
To confirm DISPLAY variable has been set, print it out in the terminal. You
may need to restart your terminal to see this change.
echo $DISPLAY
# something like 172.17.224.1:0.0
The VcXsrv GUI uses D-Bus to
internally communicate. After the export DISPLAY line in your .bashrc, add
the following:
sudo /etc/init.d/dbus start &> /dev/null
Now your user needs to be granted access to run sudo dbus without needing to
enter a password. To do so, use the visido command:
sudo visudo -f /etc/sudoers.d/dbus
In the editor that launches, add the following line, replacing <your_username>
with your username (you can use the whoami command to print your username if
you don't know it).
<your_username> ALL = (root) NOPASSWD: /etc/init.d/dbus
Go to Control Panel > System and Security > Windows Defender Firewall > Inbound Rules > New Rule.
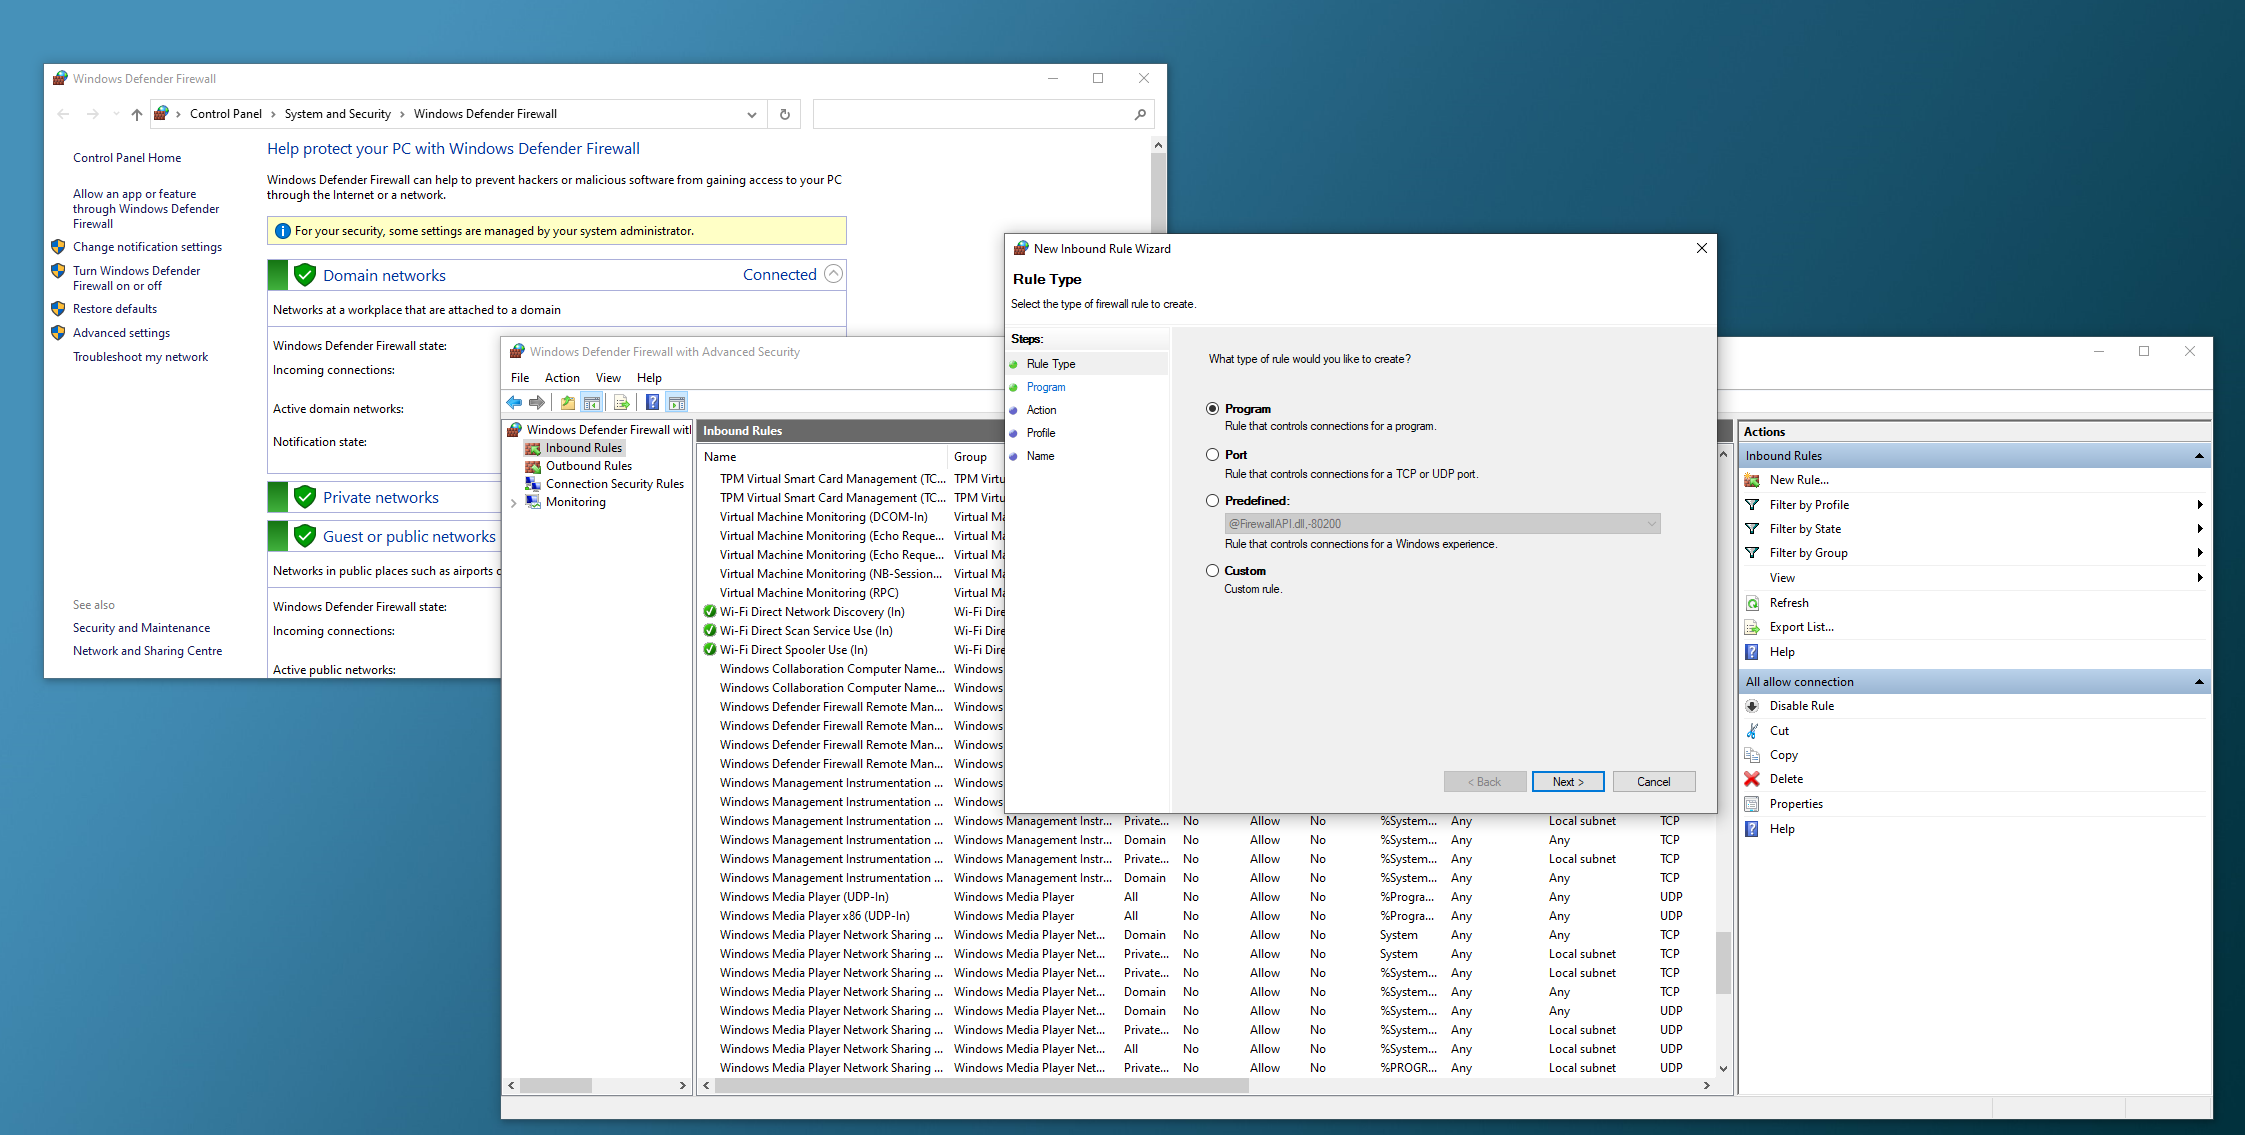
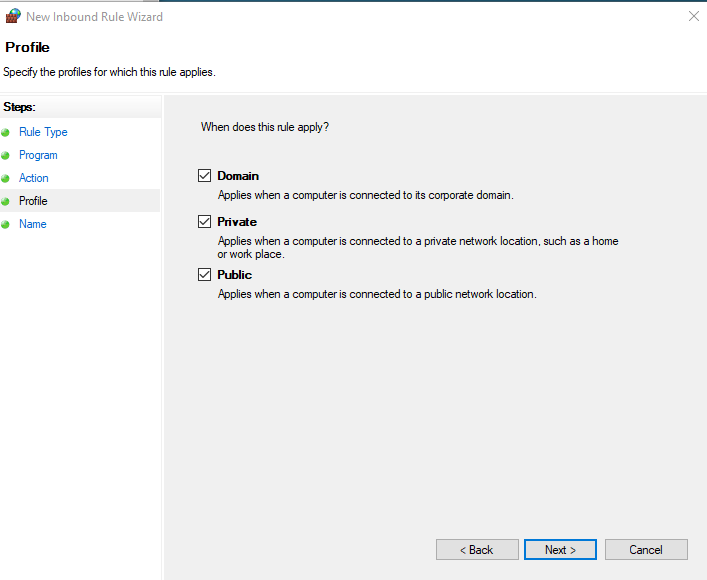
Select Program and click on next. On the This program path, browse and select path to VcxSrv. On the next page select allow the connection and click next. On the next page, select all three options (Domain, Private, Public).
Give the rule a suitable name and description and click finish. WSL2 should now be able to open a GUI from shell.